

: Age, Height, Family, Relationships, Career, Movies, Net Worth, Achievements and More")


You do not need to be a designer, pay for expensive software, or download anything to edit images like a professional. Whether you are creating social media graphics, updating a product photo, or customizing a flyer, a solid free online image editor can handle the heavy lifting right from your browser. The challenge is knowing which tools are genuinely free, which features you can actually access without hitting a paywall, and how to get the most out of them. This guide breaks down everything you need to know so you can start editing smarter today.
Why Free Online Image Editors Have Become So Powerful
Not long ago, meaningful image editing required a desktop application, a steep learning curve, and often a hefty subscription. The landscape has changed dramatically. Browser-based tools now offer capabilities that rival traditional software, including the ability to add custom text, resize images to exact pixel dimensions, apply filters, and export in multiple file formats. These tools are especially valuable for small business owners, content creators, students, and marketers who need quick, polished results without committing to a paid plan.
The key is understanding what “free” actually means for each platform. Some tools are free with usage limits, some offer a genuinely unlimited free tier, and others use a freemium model where core features like resizing and text are accessible at no cost. Knowing the difference saves you frustration mid-project.
What to Look for in a Free Online Image Editor
Before diving into tips, it helps to know which features matter most. A quality free online image editor should offer at minimum:
- The ability to upload images in common formats (JPG, PNG, WEBP)
- Resizing tools with custom pixel or percentage inputs
- Text addition with font selection and color control
- A simple, intuitive interface that does not require a tutorial to navigate
- Export or download options without forcing an account creation
Additional nice-to-have features include background removal, layered editing, shape overlays, filters, and the ability to work with templates. Not every free tool offers all of these, but many come closer than you might expect.
10 Tips for Getting the Most Out of Free Online Image Editors
1. Start With the Right Canvas Size
One of the most common mistakes people make is uploading an image and editing it before setting up the correct dimensions. Most free online editors allow you to either resize your uploaded image or set a canvas size before you begin. If you are designing for a specific platform, like an Instagram post or a website banner, entering the correct pixel dimensions upfront will save you from rescaling later and losing quality. Look for a “custom size” or “resize canvas” option before adding any other elements.
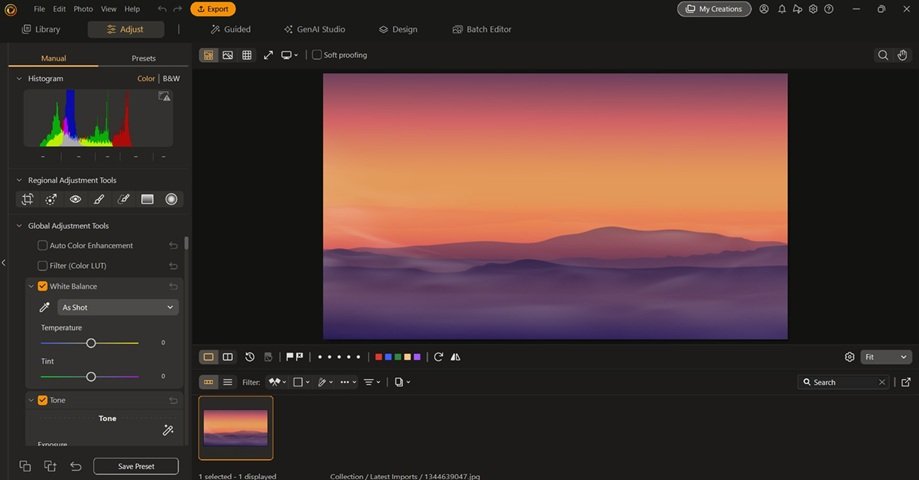
2. Use Adobe Express for Professional-Quality Edits
For users who want a reliable, well-designed tool that does not sacrifice functionality for simplicity, Adobe Express is a standout option. This photo editor offers free access to core features including image resizing, text addition, filters, and background tools. The interface is clean and beginner-friendly, and the free tier is genuinely useful without constantly pushing you toward upgrades. Adobe Express also includes a wide library of templates, fonts, and design assets that make it easy to create polished graphics quickly. It works directly in your browser with no download required, making it one of the most accessible free options available.
3. Choose Fonts That Match Your Message
When adding text to an image, font selection matters more than most people realize. A casual script font feels completely different from a bold sans-serif, and the wrong pairing can undermine an otherwise strong image. Most free online editors include a range of font categories, from display fonts to body-copy options. As a rule of thumb, stick to one or two fonts per design, use contrast to make text readable against your background, and match the font personality to the tone of your message. If your editor allows it, adjust letter spacing and line height to improve readability at a glance.
4. Resize Without Losing Quality
Resizing is one of the most frequently used features in any image editor, but it is also one of the easiest to do wrong. Scaling an image up beyond its original resolution will result in pixelation, while scaling down carelessly can create awkward compression artifacts. When using a free online resizer, always try to work from the highest-resolution version of your image. If you need to resize for web use, aim to export at 72 DPI; for print, 300 DPI is the standard. Many free tools let you lock the aspect ratio during resizing, which prevents your image from being accidentally stretched or squished.
5. Layer Text Over High-Contrast Areas
Placing white text over a light background or dark text over a dark image is a readability mistake that happens often in quick edits. Before adding text, look at your image and identify the areas with the highest contrast relative to the text color you plan to use. If no ideal spot exists, many free editors let you add a semi-transparent color block or shape behind your text, which creates a readable zone without completely covering the image. This technique is used widely in professional design and takes only a few seconds to apply.
6. Use the Crop Tool Before Resizing
Cropping and resizing are related but distinct operations. Cropping removes parts of the image you do not need, while resizing changes the overall dimensions of the image. For best results, crop first to frame your subject properly, then resize to your target dimensions. This workflow reduces the total number of pixels the editor needs to process and often produces a sharper final result. Many free tools perform both operations in the same panel, but it is worth treating them as separate steps in your mind.
7. Save Projects in an Editable Format When Possible
A lot of free online editors allow you to save your project in a native format that preserves layers, text, and other editable elements. Always take advantage of this option if it is available. If you export directly to JPG or PNG without saving the project file, you will have to rebuild the design from scratch if changes are needed later. Some tools store project files in the cloud automatically, but others require you to manually download or save to an account. Develop the habit of saving the editable version before exporting the final image.
8. Take Advantage of Preset Text Styles
Adding text from scratch and manually adjusting font, size, color, alignment, and spacing is time-consuming. Many free editors include preset text styles, sometimes labeled as “headings,” “subheadings,” or “styled text,” that apply a well-designed combination of settings in a single click. These presets are a great starting point, especially if design is not your primary skill. You can always tweak them after applying, but starting with a preset dramatically speeds up the workflow and tends to produce more visually consistent results.
9. Export at the Right Format for Your Use Case
Not all image formats are created equal, and choosing the wrong one can reduce quality or increase file size unnecessarily. PNG is best for images that contain text, logos, or areas of flat color, because it preserves sharp edges and supports transparency. JPG is better suited for photographs where file size matters more than perfect sharpness. WEBP is a newer format that offers good quality at smaller file sizes, making it ideal for web use. Most free online editors support all three, and choosing the right format at export time can make a noticeable difference in how your final image looks and performs.
10. Use Keyboard Shortcuts to Speed Up Editing
Even in browser-based tools, many free image editors support keyboard shortcuts for common actions like undo, zoom, copy, and paste. Learning even a handful of these shortcuts can significantly speed up your workflow. Common ones include Ctrl+Z (or Cmd+Z on Mac) for undo, Ctrl+D for deselect, and arrow keys for nudging elements into position. If your editor has a help section or shortcut reference, it is worth a quick scan before your first major project. Muscle memory builds quickly, and within a few sessions you will move through edits noticeably faster.
Comparing Free vs. Paid Tiers: What You Actually Need
Most people overestimate how much functionality they need from a paid plan. For the majority of everyday tasks, including resizing photos for social media, adding branded text to graphics, and exporting clean final files, the free tier of a well-designed editor is more than sufficient. Paid plans typically add value in areas like premium asset libraries, brand kit storage, higher export resolution, collaboration tools, and access to advanced effects. If you are a solo creator or a small team with straightforward needs, it is worth testing a free plan thoroughly before assuming an upgrade is necessary.
How to Add Text to an Image: A Quick Workflow
If you are new to online image editing, here is a simple workflow for adding text to an image using most free browser-based tools:
- Open the image editor and upload your image.
- Select the text tool, often represented by a “T” icon in the toolbar.
- Click on the area of the image where you want the text to appear.
- Type your text, then use the formatting panel to adjust font, size, color, and alignment.
- Drag the text box to your preferred location.
- Use the resize handles to scale the text box if needed.
- Add any background shapes or overlays to improve readability.
- Export your finished image in the appropriate format.
This workflow takes only a few minutes once you are familiar with the tool, and the results look far more polished than adding text through basic photo apps on a phone.
FAQ: Free Online Image Editors for Text and Resizing
Can I really add text and resize images for free online without creating an account?
Yes, several browser-based tools allow you to upload an image, add text, resize it, and download the result without requiring an account. These no-sign-up options are convenient for one-off tasks, though creating a free account often unlocks the ability to save projects for later editing. If you find yourself using the same tool regularly, a free account is worth setting up so your work is not lost between sessions. Keep in mind that tool availability and specific features can vary, so it is worth trying a few options to find the one that fits your workflow best.
Will resizing an image online reduce its quality?
Resizing can affect image quality depending on the direction and degree of the change. Scaling an image down generally preserves quality well, especially with modern browser-based tools that use smooth interpolation algorithms. Scaling up, however, introduces pixelation because the tool has to guess at pixel data that was never there. The best practice is to always work from the largest, highest-resolution version of your image and resize down to your target dimensions. If you frequently need to upscale low-resolution images, there are dedicated AI upscaling tools, such as Let’s Enhance, that use machine learning to intelligently add detail when increasing image size.
What is the best font size for adding text to an image for social media?
Font size for social media images depends on both the image dimensions and the platform. For a standard 1080 x 1080 pixel Instagram post, a headline text size of 60 to 100 pixels typically reads well on both desktop and mobile screens. Supporting text or captions used within the image should be smaller, around 30 to 50 pixels, to maintain visual hierarchy. For Stories or Reels (1080 x 1920 pixels), you can go larger since the format fills more of the screen. Always preview your design at reduced size before publishing, because what looks readable at full screen can become hard to read as a thumbnail.
Is it safe to upload personal or sensitive images to free online editors?
This is an important question worth taking seriously. Most reputable free online editors have privacy policies that outline how uploaded images are handled, typically stating that they do not store or use your images beyond the editing session. However, it is always wise to read the privacy policy of any tool before uploading sensitive, confidential, or personally identifiable images. For highly sensitive material, a locally installed application may be a safer option. For everyday images like product photos, marketing graphics, or public-facing content, reputable browser-based editors are generally safe and widely used by professionals.
Can free online image editors handle batch resizing or do I need to resize images one at a time?
Most free online image editors are designed for single-image editing sessions, meaning batch processing is typically a paid or advanced feature. If you regularly need to resize large numbers of images at once, it may be worth exploring tools that specialize in batch operations. Some free browser-based tools do offer limited batch functionality, particularly for resizing, so it is worth checking the feature list of any tool you use regularly. For high-volume workflows, a lightweight desktop tool or a script-based solution may be more efficient. For the vast majority of users, though, single-image editing in a free browser tool covers everything they need day to day.
Final Thoughts
Free online image editors have come a long way, and for most users they offer everything needed to create professional-looking graphics without spending a dime. The key is knowing how to use them strategically: starting with the right dimensions, choosing fonts thoughtfully, resizing with quality in mind, and exporting in the correct format. Tools like Adobe Express have raised the bar for what free access can look like, offering robust features that were once reserved for paid software. Whether you are building a brand, managing content, or just need to clean up a photo quickly, the right free editor is out there and easier to use than you might think. Start with one tool, learn it well, and let your projects guide you toward any additional features you eventually need.
Refresh Date: May 6, 2026